Recover Abandoned Cart: Campaign Setup Guide
Last updated: July 15, 2026
Prerequisites
An Outcraft AI account you can create or edit campaigns in
Admin access to your store platform — Shopify store admin, Klaviyo Administrator, or your dev team for a Custom API integration
Discount codes created in your store that this campaign may offer (unique to Outcraft for attribution)
Admin access for the sending mailbox (Google Workspace admin, Microsoft 365 admin, or IMAP credentials)
The Recover Abandoned Cart campaign type is designed for ecommerce brands to engage potential customers who left an item in their cart without completing the purchase. Outcraft reaches out to convert the sale, offering incentives and deals as part of the campaign.
1. Create the campaign
Log in and go to app.outcraft.ai/campaigns.
Click + Create New and type a name for your campaign.
Select Create New Company, then Create.
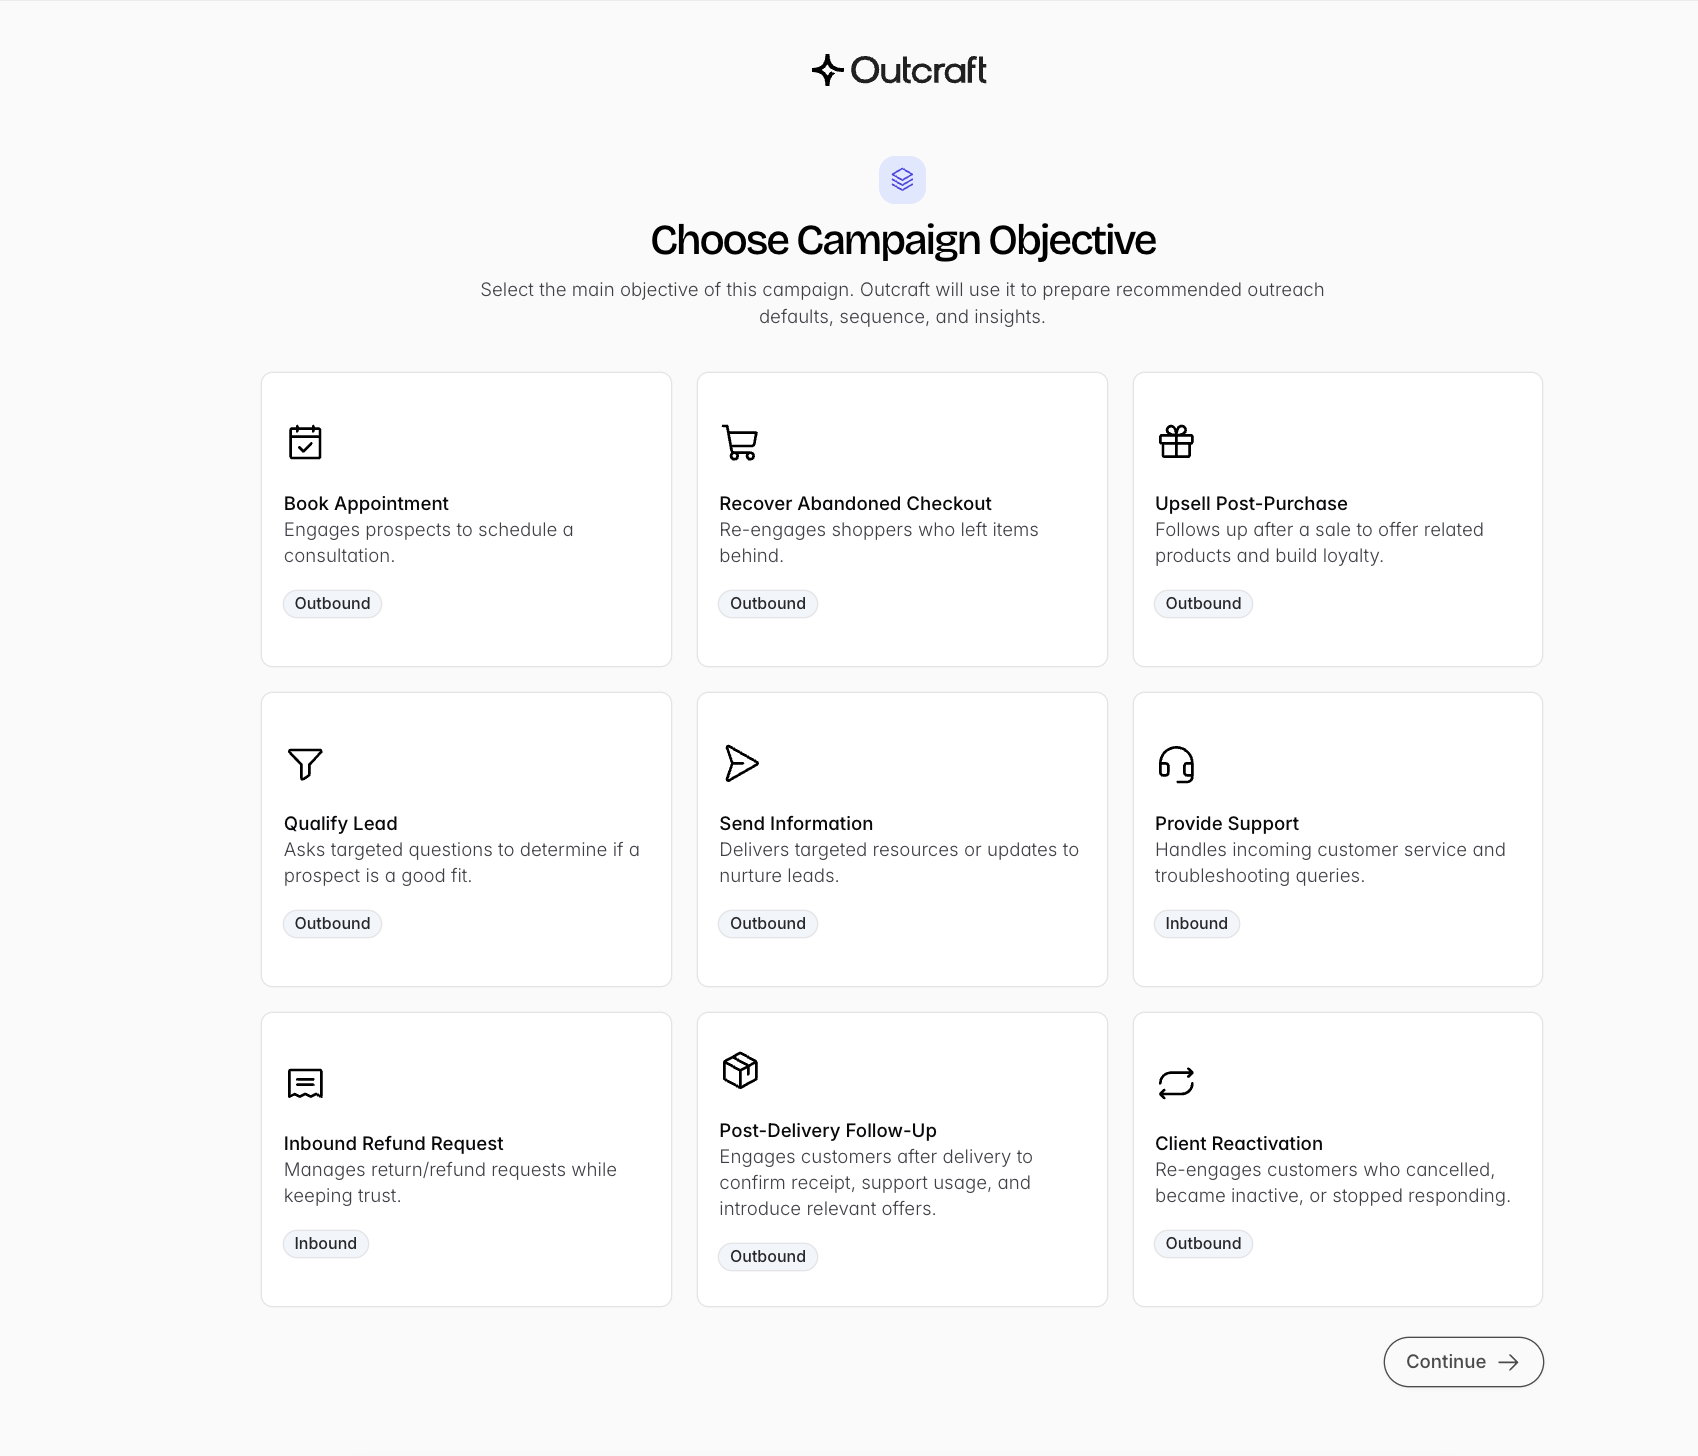
Select Recover Abandoned Cart, then Continue.
2. Choose your lead source
Select one of the three available integrations to source leads into Outcraft AI.
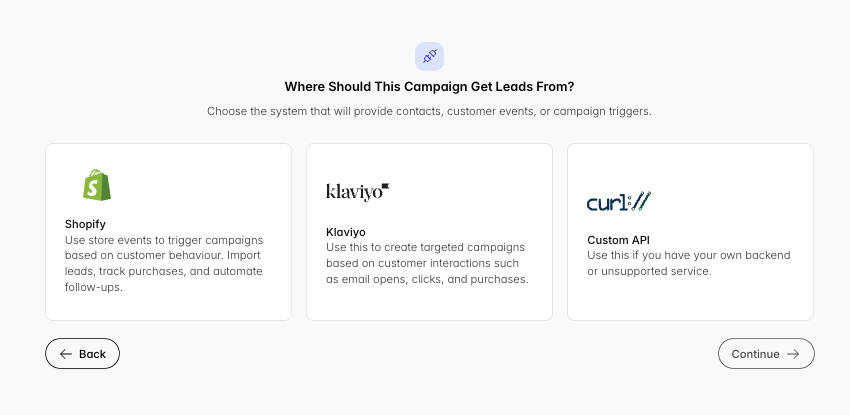
Tip: If you use both Shopify and Klaviyo, the system works best connected directly to Shopify, with your Klaviyo flows running separately from Outcraft.
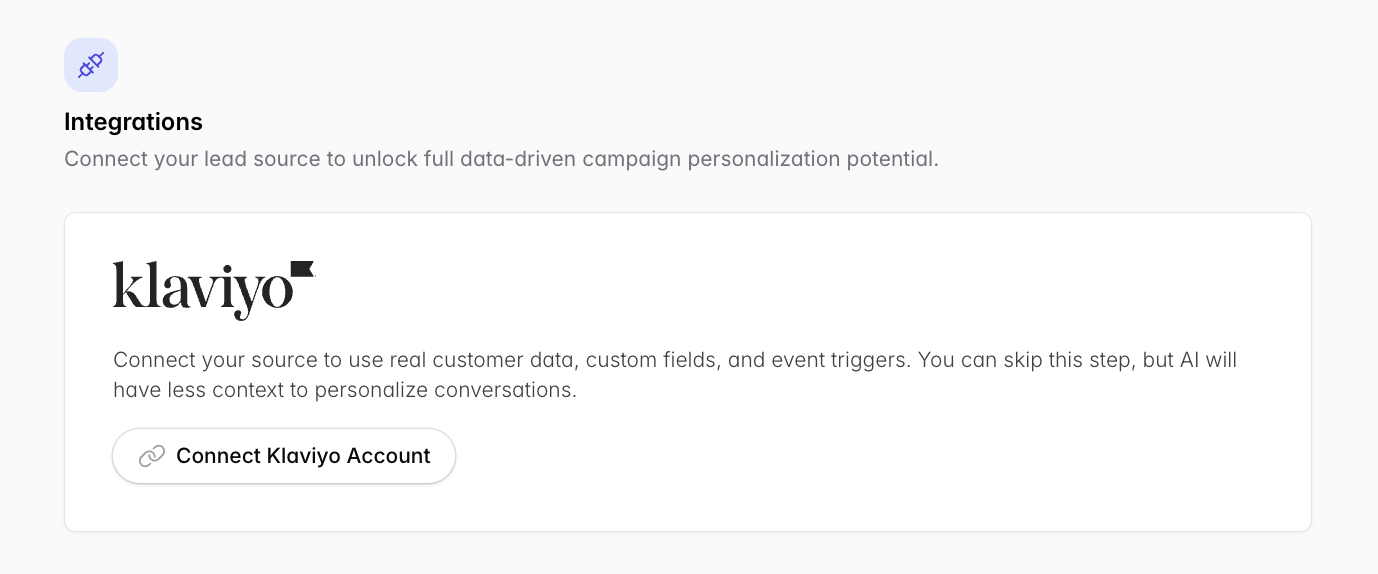
If you are using Klaviyo to source leads, click Connect Klaviyo Account now using Administrator permissions.
3. Set up the shared campaign steps
These steps are the same for every outbound campaign type:
Company profile (Identity, Industry, Compliance) → Setting Up Your Company Profile
Campaign Brief, Guardrails & Custom Fields → Writing Your Campaign Brief
General Settings (follow-ups, sendable links, hand-offs) → General Settings guide
Schedule → Setting Campaign Schedule
Outreach Channels → Configuring Outreach Channels
Outreach Sequence & Follow-Ups → Building Your Outreach Sequence
Interaction Evaluations → Setting Up Interaction Evaluations
AI Agent configuration → AI Agent Configuration
Phone numbers → Adding Phone Numbers
Email accounts → Connecting Email Accounts
4. Offers & Incentives (unique to this campaign type)
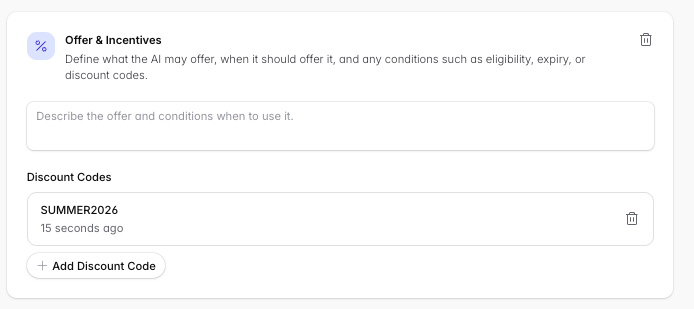
In the campaign Instructions, use Add Instruction Section to register discount codes.
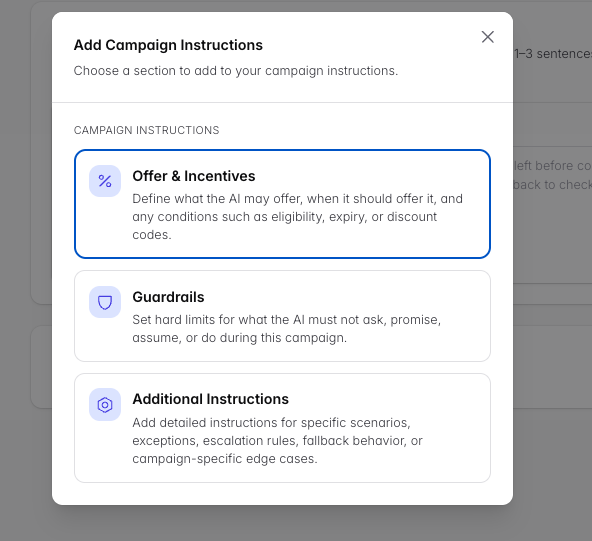
Register the codes this campaign may use (e.g.
FINISH10). The code referenced in your prompt should match one registered here.Tiered discounting. A common, effective setup is two codes: a standard offer (e.g. 10%) the agent leads with, and a higher code (e.g. 15%) reserved only for leads who keep hesitating on price. Register both and describe in the prompt when to use each.
Keep codes short and sayable — e.g.
COMEBACK10orFINISH15, not random letters and numbers. The agent says the code aloud and the customer has to remember it.Use a code unique to Outcraft AI. Otherwise it is difficult to attribute which sales the tool assisted.
Provide 1–2 sentences on how and when the agent should offer the discount, including key words or phrases to listen for.
5. Cart links: static vs. dynamic (unique to this campaign type)
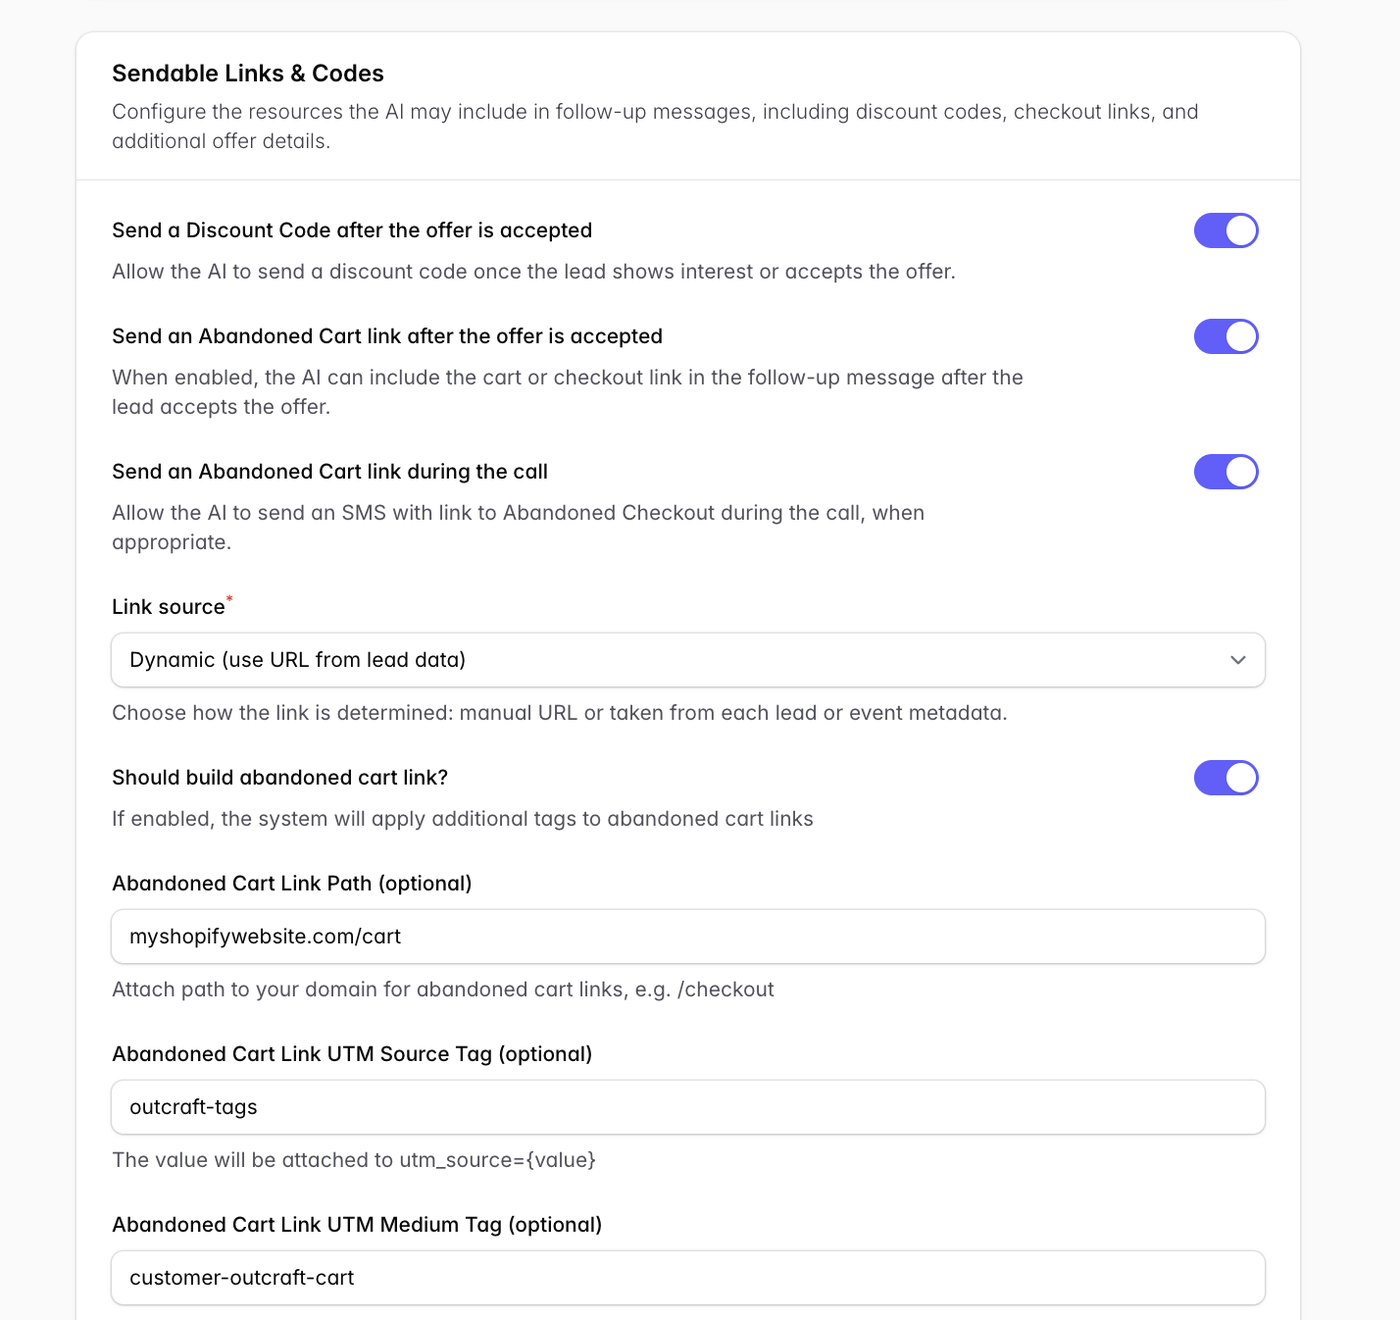
In General Settings → Sendable links & codes, control what the AI may include in messages: discount codes, abandoned-cart links (during the call and/or after the offer is accepted), link source, UTM tags, and link shortening.
Static link: use if you sell a single product — the same link suits everyone.
Dynamic link: use for multi-product stores so each lead returns to their exact cart, including anything already filled in. Ensure dynamic links are delivered to Outcraft in the lead metadata.
Link shortening keeps SMS short and tappable and enables click tracking in Outcraft analytics.
See also: How to setup Dynamic Cart Link (unique_id) using Custom API
6. Configure your lead source
Shopify
Connect your store, set the dispatch limit and cooldown, and enable all three Shopify webhooks — the events deliver dynamic cart links and checkout data to Outcraft, and the order-placed event is what stops the campaign from contacting leads who have already purchased.
Full walkthrough with screenshots → Connecting Shopify as a Lead Source
Klaviyo
See Using Klaviyo Flows as a Lead Source.
Custom API
See Using the Custom API as a Lead Source.
7. Review & launch
Once everything above is set, click Review and Publish.